

Appearance
Members & invitations
Add people to a workspace by invitation or by creating them directly, change their role, and remove or deactivate them.
Who can do this
Everything on this page needs Manage members and roles (Owner and Admin by default). Without it, Members & roles is not on your rail.
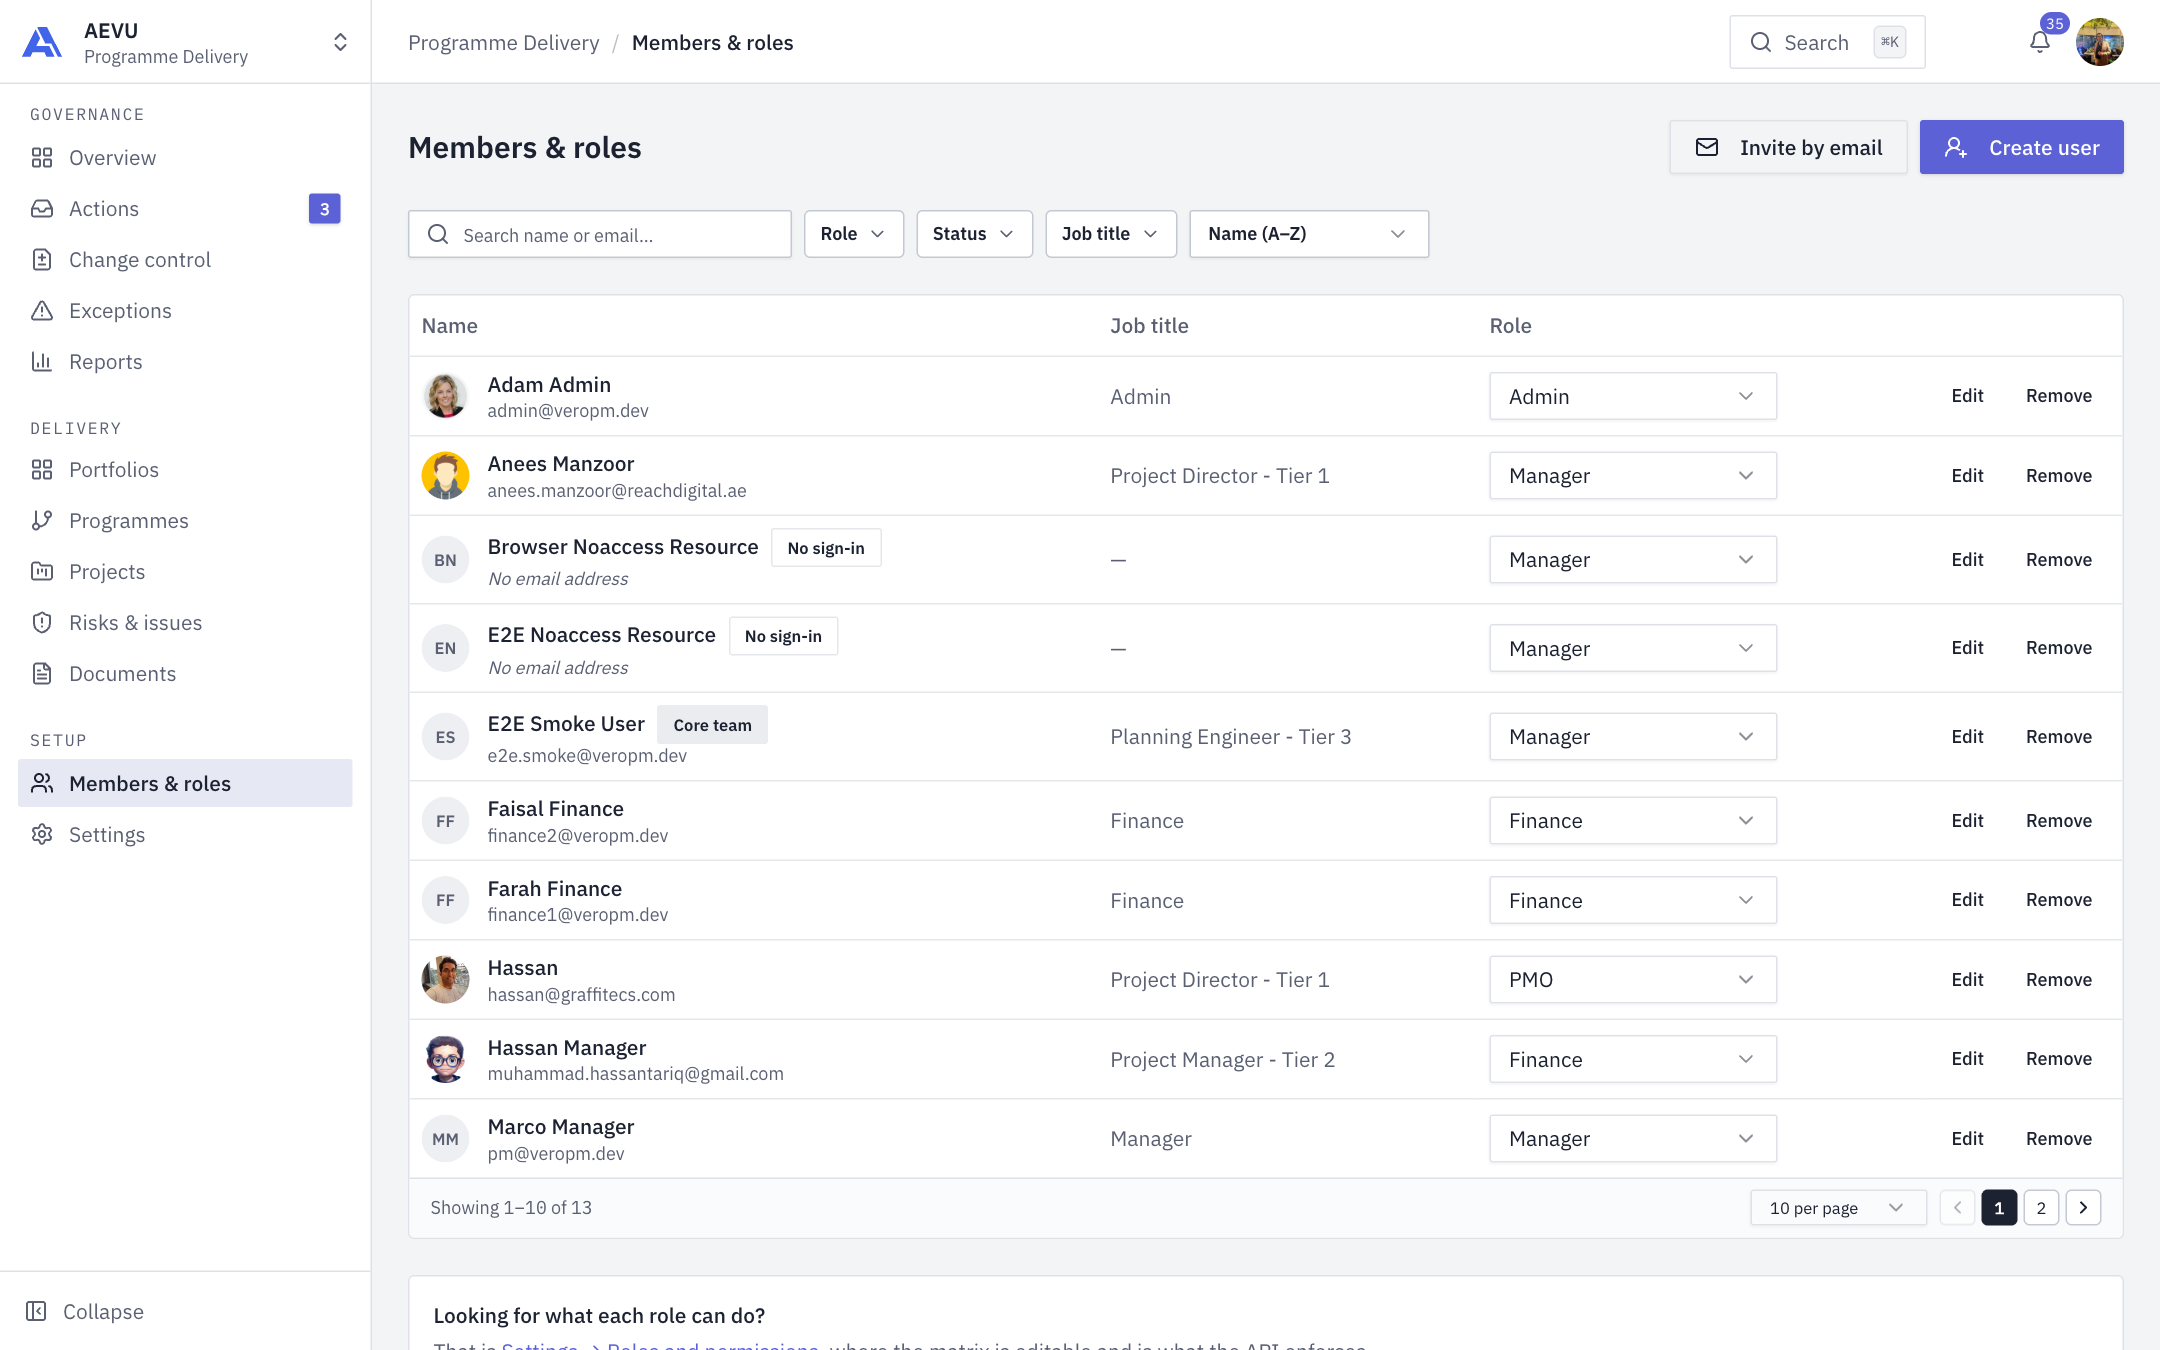
The roster
Open Members & roles under Setup. The table lists each person's Name, Job title and Role. Use Search name or email… and the Role, Status and Job title filters, or sort the list; Clear filters resets them. People are listed by seniority (Owner, Admin, PMO, Manager, Finance, then custom roles).
Badges you may see:
- No sign-in — a resource who can be assigned and costed but can never sign in.
- Core team — flagged as part of the core team (an email address is required).
- Deactivated everywhere / in this workspace — see below.
Invite someone by email
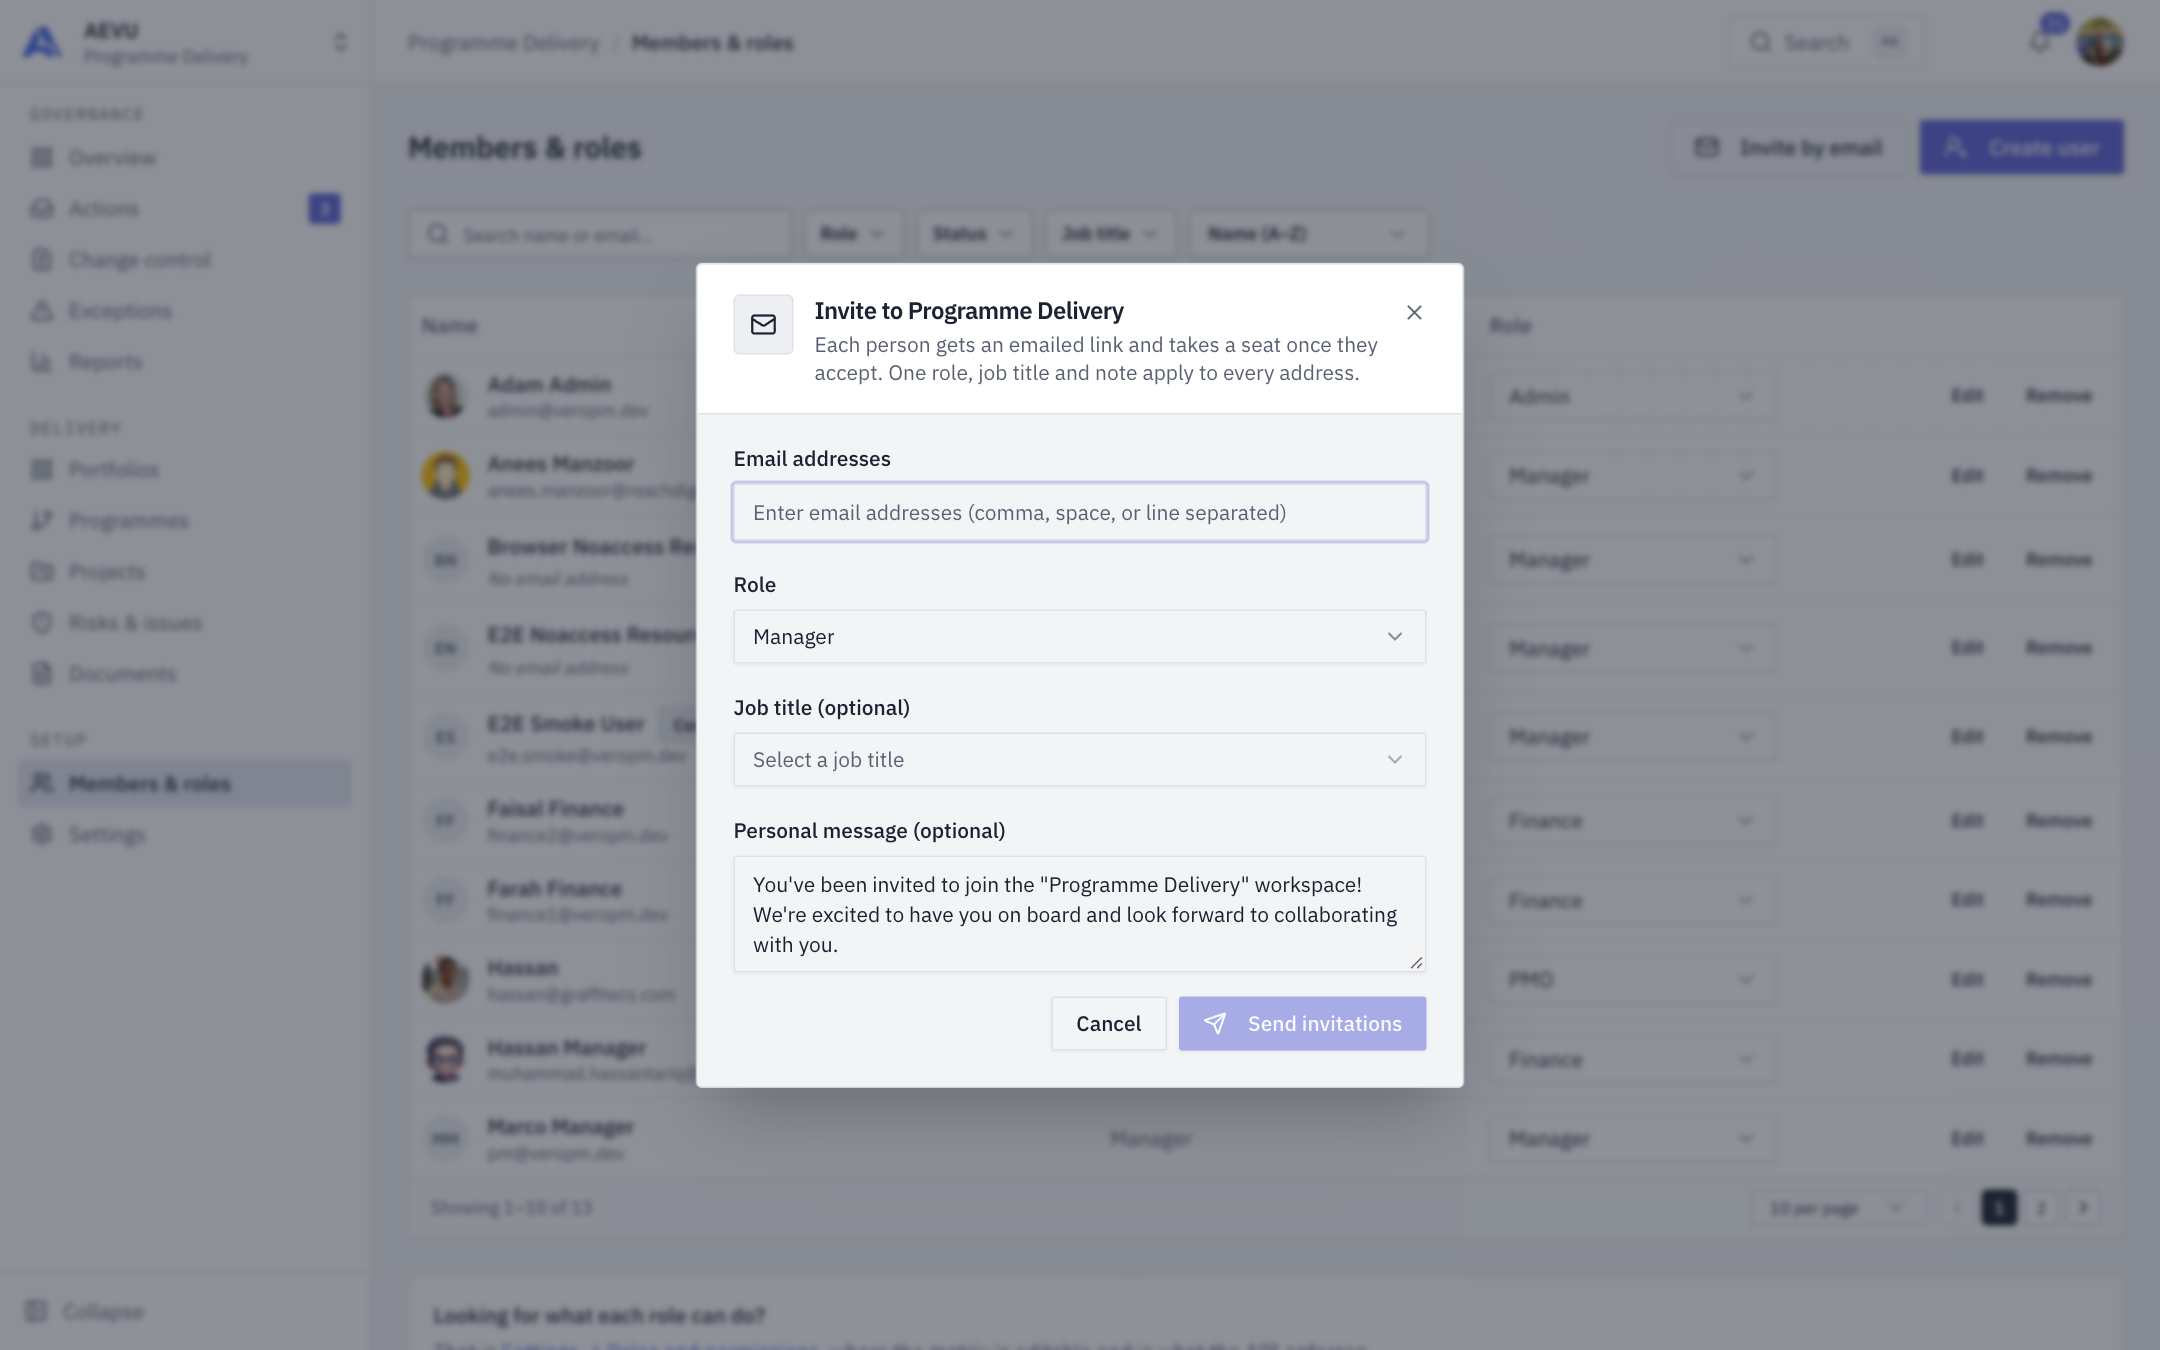
- Click Invite by email. The Invite to dialog (titled with the workspace name) dialog opens; each person gets an emailed link and takes a seat once they accept.
- Enter one or more Email addresses, choose a Role, optionally a Job title and a Personal message.
- Click Send invitations. The personal message is pre-filled with a short welcome you can edit.
Pending invitations are shown with their sent and expiry dates; you can Resend or cancel them. A pending invitation reserves a seat until it is accepted, cancelled or expires.
Create a user directly
- Click Create user.
- Under Workspace access choose:
- With access — an active account the person signs in to. Optionally tick Email a set-password link (it works once and expires in 48 hours); otherwise they use Forgot password on the sign-in page. You never see their password.
- Without sign-in access — a resource who can be assigned tasks and allocated time but never signs in.
- Fill Full name, Email (required for people with access and core-team members), optional Phone and Job title, and choose a Role.
Change a role, job title or access
- Use the Role dropdown on the row to change a role. Only an Owner can grant Admin or Owner.
- Click Edit to set the Job title (it drives labour cost), send a set-password link, Reset password, or Deactivate / Activate.
- Reset password generates a strong password and shows it once so you can pass it on; it signs the person out everywhere.
- Deactivate stops the person signing in anywhere; their memberships stay. You choose where it applies.
Remove a member
Click Remove on the row and confirm. The person loses access to the workspace straight away; their account and everything they did stay, and you can add them back later.
Limits
- You cannot change, remove or deactivate yourself.
- The Owner cannot be removed, deactivated or have their role changed — by anyone.
- If the plan's seat limit is reached you will see an upgrade prompt. See Plans, trials & billing.
See also Roles & permissions.